Introduction
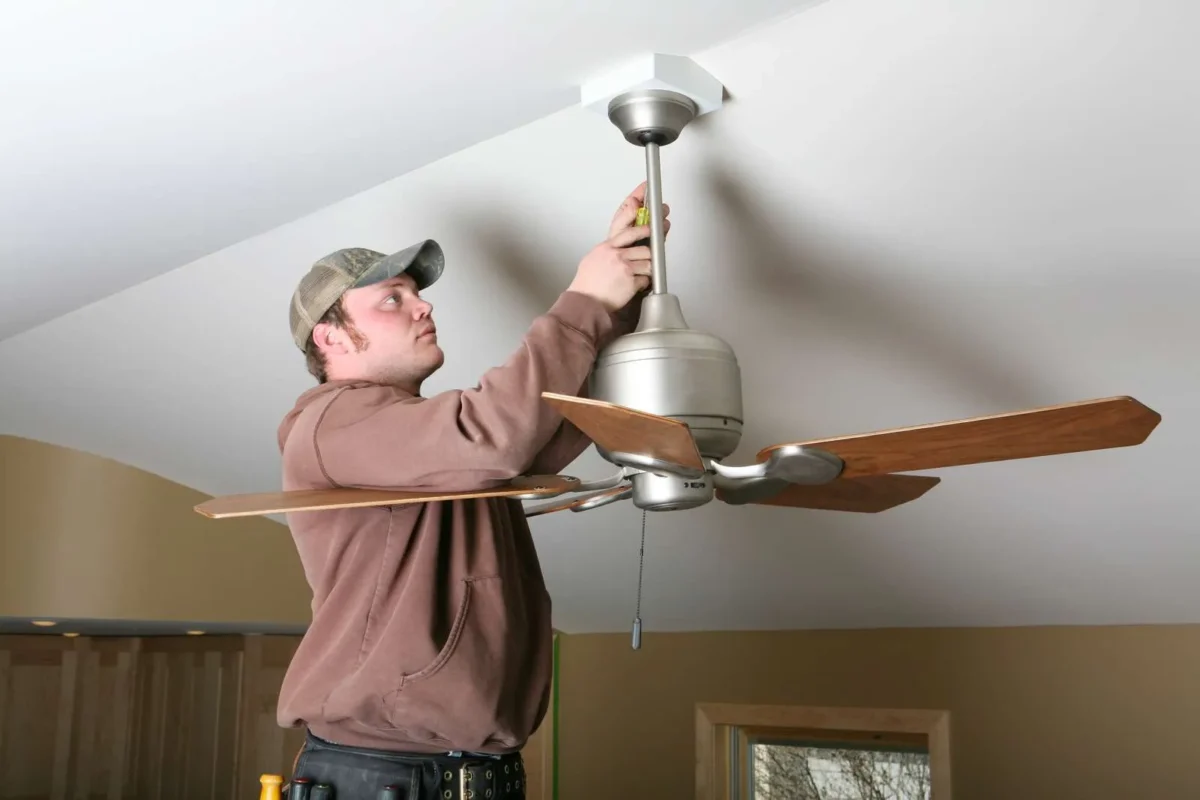
Though installing a ceiling fan can seem like a difficult chore, you can do it yourself with the correct equipment, expertise, and a little patience. Along with saving money on expert installation costs, this will increase the comfort and energy efficiency of your house. We will walk you through the safe and secure installation of a ceiling fan in this detailed tutorial. This tutorial will guarantee your fan is set up correctly and safely whether you are installing a brand-new one or replacing an old one.
Why might one install a ceiling fan?
Among several advantages ceiling fans provide are:
- Enhanced air circulation from ceiling fans guarantees enhanced comfort all year long by helping to disperse air fairly around a room.
- Energy Efficiency: During the summer, a ceiling fan may cool a room; during the winter, it can move warm air, therefore lowering your heating and cooling expenses.
- Any room would benefit much from a fashionable ceiling fan, which accentuates its whole design and ambiance.
- Knowing the reasons a ceiling fan is a wise purchase will help us get into how to install one.
Detailed Guide for Installing a Ceiling Fan
Make sure you have all you will need before beginning. You will require the following:
- Kit for a ceiling fan with all the parts.
- Ladder
- Both Phillips and flathead screwdrivers
- Pliers:
- Wire strippers and cutters
- A voltage tester
- Drill bit-wise.
- Electrical box suited for support of a ceiling fan
- Electronic tape
- First step: cut off the power.
- First and most importantly is safety.
Step 1: Turning off the electricity to the circuit from which you will be working comes first in installing a ceiling fan. Go to the breaker panel in your house and turn off the light or ceiling fan.
Step 2: take down the old fixture.
Should you be changing a current fixture, gently remove it by unscrewing the mounting bracket and detaching the cables. If you intend to use the same connections, be sure you maintain track of the wire.
Step 3 is to install the ceiling fan mounting bracket.
Attach the mounting bracket to the electrical box in the ceiling with the screws you have from your ceiling fan kit. Verify the electrical box’s rating for installation of ceiling fans. This box has to be strong enough to handle fan weight and movement. To guarantee a strong attachment, tightly screw-on.
Step 4: put together the ceiling fan components.
Assemble the fan blades and other parts following manufacturer directions before raising the fan into place. This will let you hang the fan more easily and lessen the need for once it’s up adjustments.
Step 5 wire connectivity
You will now link the fan’s wire to that of your ceiling. Usually you will have to connect:
- From the ceiling, black wire—hot wire—then to the black wire from the fan.
- From the ceiling, white wire—neutral—then to the white wire from the fan.
- Ground wire from the ceiling—green or bare—to the green or bare wire from the fan. For extra security, wrap each connection with electrical tape and fasteners wire nuts for. Make sure no exposed wires show themselves.
Step 6: Fastener the Fan to the Mounting Bracket
Lift the fan up to the mounting bracket and fasteners or bolts supplied once the wiring is firmly attached. Tightly fastened the fan will help to prevent any swaying.
Step 7: Afford the Fan Blades
Attach the fan blades to the motor using the fan body as guide. While tightening the screws firmly, be careful not to overtighten since this can harm the blades.
Step 8: Examine the Fan
Turn the power back on at the breaker panel and test the fan before you call it finished. See whether the blades are rotating free-willingly and listen for any odd sounds. Should the fan wobble or emit noise, you might have to change the blade balance or make sure the mounting bracket is firmly fixed.
Step 9 is final corrections and cleanup.
Once the fan is running as it should, you can make any required changes including fan blade balance or fan speed setting modification. Eliminating any tools, packing, and trash will help to clean the space.

Advantages of expertly installing something
Although you might save money by installing a ceiling fan on your own, employing a qualified electrician has advantages particularly if:
Working with electrical wire makes you uneasy.
Your ceiling box is not rated for use with a ceiling fan.
You run across problems with the installation calling for more sophisticated troubleshooting.
Local electrical rules allow a certified electrician to guarantee that your fan is securely placed.
FAQ:
Can I install a ceiling fan without a current fixture already in place?
Indeed, you can install a ceiling fan in a room without a fixture; but, first you must install a ceiling fan-rated electrical box. This can be a more complicated chore since it calls for drilling into the ceiling joists and securing the box.
Does a ceiling fan call for a specific electrical box?
You really have to use an electrical box meant to accommodate ceiling fans. Regular light boxes can be a safety threat since they are insufficient to support a ceiling fan’s weight.
How can I strike a compromise with a wobbling ceiling fan?
If your fan wobbles, check that no screws are loose and that all of the fan blades are correctly attached. A blade balancing kit will also assist in blade balance.
What happens should my ceiling fan fail to turn on?
Check the wire connections to be sure they are secure if the fan is not turning on. Check also if the fan’s remote or wall switch is set to the proper setting and the circuit breaker is on.
Could I put up a ceiling fan by myself?
Indeed, if a homeowner follows the directions precisely, most of them can install a ceiling fan by themselves. To reduce any hazards, though, if you have questions regarding any element of the installation you should think about consulting an expert.
Conclusion
Most do-it-yourselfers can handle installing a ceiling fan as it’s a great method to improve the comfort and energy economy of your house with the correct tools and guidance. Following this thorough advice will help you install your ceiling fan securely and safely, therefore guaranteeing years of effective operation. See a professional to help you if you’re not sure or uncomfortable with any step.
Get Expert Advice Right Now by Contacting Us!
- Email: info@blowox.com
- Visit: blowox.com


Top 10 Best Outdoor Patio Ceiling Fans to Beat the Heat in 2025
Having the best outdoor patio ceiling fan will make all the difference in how much [...]
Top 10 Best 3 Blade Ceiling Fans for Modern Homes in 2025
Finding the best 3 blade ceiling fan can transform the ambiance and comfort of your [...]
Reviews, Features, and Shopping Advice for 2025’s Best Modern Ceiling Fans
Modern ceiling fans have evolved from a mere cooling solution to a statement of efficiency [...]
How to Operate a Ceiling Fan: Expert Tricks to Save Money and Stay Cool
More than merely ornamental accents, ceiling fans are reasonably priced means of improving comfort and [...]
Top 10 Cheap Outdoor Ceiling Fans That Offer Style and Durability in 2025
Finding the ideal cheap outdoor ceiling fan does not mean you have to give up [...]
Does Leaving a Ceiling Fan On Waste Electricity? 5 Surprising Facts You Should Know
Many homes find ceiling fans to be the go-to fix for home comfort. Still, a [...]
Does Reversing a Ceiling Fan Make It Warmer? The Winter Home Hack You Need to Know
Homeowners sometimes look for creative solutions to keep their houses comfortable without going broke as [...]
Does Reversing a Ceiling Fan Work? The Winter Energy Hack You Need to Know
Heating bills can explode when temperatures fall. You might be asking: Does reversing a ceiling [...]
Does Running a Ceiling Fan Help with Air Conditioning? 5 Surprising Benefits You Need to Know
Maintaining coolness in your environment may be both a need and a comfort throughout summer. [...]
The Ultimate Guide to Choosing the Best Ceiling Fan for Small Room
Choosing the Best Ceiling Fan for Small Room will revolutionize the comfort and design enhancement [...]