Introduction
Although Ceiling Fan Motor Replacement may seem like a daunting task, it’s manageable with the right tools and guidance. Whether your fan motor is broken, outdated, or simply not functioning efficiently, replacing the ceiling fan motor can save on energy costs and restore your fan’s performance. In this step-by-step guide, we’ll walk you through the process of replacing your ceiling fan motor, helping you get your fan working like new again.
Why You Should Replace the Motor in Your Ceiling Fan
Understanding why a ceiling fan motor replacement might be necessary is the first step in appreciating the process. Over time, ceiling fan motors can wear out due to heavy use, dust exposure, or aging components. Symptoms of a malfunctioning motor include reduced airflow, uneven fan speeds, or total motor failure. Replacing the motor ensures smooth operation and optimizes the performance of your ceiling fan.

Tools You’ll Need to Replace a Ceiling Fan Motor
Before you begin, make sure you have the following tools on hand:
- Flathead and Phillips screwdrivers
- Ladder
- Voltage tester
- Electrical tape
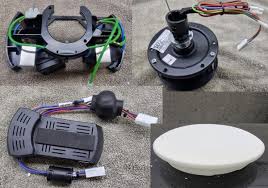
- Replacement motor for your ceiling fan
- Wrench set
Having these tools available will make your ceiling fan motor replacement smoother and more efficient.
Step-by-Step Guide to Replacing Your Ceiling Fan Motor
Step 1: Turn Off the Power
Safety should always be your top priority when working with electrical components. Cut the power to your ceiling fan at the circuit breaker before starting. Use a voltage tester to ensure that the power is completely off. This step is crucial to prevent electrical shock during the ceiling fan motor replacement process.
Step 2: Remove the Ceiling Fan Blades
Next, remove the fan blades. Most ceiling fans have screws or nuts holding the blades in place. Carefully unscrew the blades and set them aside. This step gives you easier access to the motor and simplifies the replacement process.
Step 3: Detach the Ceiling Fan from Its Mount
With the blades removed, it’s time to detach the fan body from the ceiling mount. Depending on your fan’s design, you may need to remove bolts or screws securing the fan to the ceiling. Ceiling fans can be heavy, so it’s helpful to have someone assist you during this step.
Step 4: Remove the Old Ceiling Fan Motor
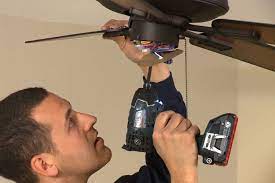
Once the fan body is disconnected, you should be able to access the motor. Most ceiling fan motors are secured with bolts or screws. Use your wrench set to loosen these fasteners, then gently remove the old motor. Handle the motor carefully to avoid damaging nearby components.
Step 5: Install the New Ceiling Fan Motor
Now it’s time to install the new motor. Position the new motor in place, and secure it with the bolts or screws. Before tightening everything, ensure that the motor is properly aligned to guarantee optimal performance once the fan is reassembled.

Step 6: Reconnect the Wiring
Ceiling fan motors have a few electrical connections that need to be properly attached. As you cut the wiring of the old motor, note the wire colors for easy reconnection. Attach the wires from the new motor to the existing fan wiring using wire nuts or electrical tape. Double-check the connections to ensure they are secure and safe.
Step 7: Reassemble the Ceiling Fan
Once the new motor is installed and the wiring is reconnected, you can begin reassembling the ceiling fan. Reattach the fan blades and ensure all screws are properly tightened. Your ceiling fan is now ready for testing.
Step 8: Test the New Ceiling Fan Motor
Turn the power back on at the circuit breaker and test the fan. Check for optimal airflow, smooth operation, and proper speed settings. If everything is functioning correctly, congratulations! You’ve successfully replaced your ceiling fan motor.

Frequently Asked Questions (FAQ) About Ceiling Fan Motor Replacement
1. How can I tell if my ceiling fan motor needs to be replaced?
Signs that your ceiling fan motor might need replacing include unusual noises, trouble starting, or uneven airflow. If the motor is no longer functioning properly, the fan’s overall performance will be affected.
2. Can I replace the motor in any ceiling fan?
While most ceiling fan motors are interchangeable, certain older or specialty fans may require specific parts or professional installation. Always verify with the manufacturer or consult an expert before attempting a motor replacement.
3. Is replacing a ceiling fan motor difficult?
Replacing a ceiling fan motor is a manageable task for those with basic DIY skills. However, since it involves working with electrical components, it’s important to follow all safety protocols. If you’re unsure, it’s best to consult a professional.
4. How much does it cost to replace a ceiling fan motor?
The cost of a ceiling fan motor replacement depends on the brand and type of fan. Typically, a replacement motor can cost anywhere from $50 to $200, excluding labor costs if you hire a professional.
5. Can I install a new ceiling fan motor myself?
Yes, most DIYers can install a new ceiling fan motor themselves if they follow the instructions carefully and take proper safety precautions. If you’re not comfortable working with electricity, it’s a good idea to call a licensed electrician.
Final Thoughts
Replacing the motor in your ceiling fan is a straightforward task that can significantly improve its performance. By following this detailed guide, you can ensure a successful and safe motor replacement. Always remember that safety is paramount—turn off the power before beginning any electrical work. Whether you’re upgrading to a more efficient motor or repairing a faulty one, this process will help your ceiling fan run smoothly for years to come.
If you feel unsure about performing the motor replacement on your own or if the issue persists after replacement, it’s always a good idea to consult with a professional to ensure your ceiling fan is in optimal working condition.
References
- “Ceiling Fan Troubleshooting Guide.” Store for Ceiling Fans: 2023.
- “Rules for Changing a Ceiling Fan Motor.” The Home Depot, 2022.
- “Electrical Safety Notes for Home Projects.” Consumer Product Safety Commission, 2021.
Get Expert Advice Right Now by Contacting Us!
- Email: info@blowox.com
- Visit: blowox.com


Top 10 Best Outdoor Patio Ceiling Fans to Beat the Heat in 2025
Having the best outdoor patio ceiling fan will make all the difference in how much [...]
Top 10 Best 3 Blade Ceiling Fans for Modern Homes in 2025
Finding the best 3 blade ceiling fan can transform the ambiance and comfort of your [...]
Reviews, Features, and Shopping Advice for 2025’s Best Modern Ceiling Fans
Modern ceiling fans have evolved from a mere cooling solution to a statement of efficiency [...]
How to Operate a Ceiling Fan: Expert Tricks to Save Money and Stay Cool
More than merely ornamental accents, ceiling fans are reasonably priced means of improving comfort and [...]
Top 10 Cheap Outdoor Ceiling Fans That Offer Style and Durability in 2025
Finding the ideal cheap outdoor ceiling fan does not mean you have to give up [...]
Does Leaving a Ceiling Fan On Waste Electricity? 5 Surprising Facts You Should Know
Many homes find ceiling fans to be the go-to fix for home comfort. Still, a [...]
Does Reversing a Ceiling Fan Make It Warmer? The Winter Home Hack You Need to Know
Homeowners sometimes look for creative solutions to keep their houses comfortable without going broke as [...]
Does Reversing a Ceiling Fan Work? The Winter Energy Hack You Need to Know
Heating bills can explode when temperatures fall. You might be asking: Does reversing a ceiling [...]
Does Running a Ceiling Fan Help with Air Conditioning? 5 Surprising Benefits You Need to Know
Maintaining coolness in your environment may be both a need and a comfort throughout summer. [...]
The Ultimate Guide to Choosing the Best Ceiling Fan for Small Room
Choosing the Best Ceiling Fan for Small Room will revolutionize the comfort and design enhancement [...]